touch 触摸事件以及常用触摸功能
🧑🏻💻 作者:俊小赞
🗓️ 发布时间:2021-07-18
🕘 最后更新:2个月前
🔢 字数统计:751
📖 预计阅读:2分钟
前言
为了给基于触摸的用户界面提供高质量的支持,触摸事件提供了在触摸屏或触控板上解释手指(或触控笔)活动的能力。我们可以通过触摸事件监听用户的操作,从而响应用户。
一、触摸事件
触摸事件主要有三种,一种是触摸开始,一种是触摸并且滑动,还有一种是触摸结束:
- touchstart: 开始触摸.
- touchmove: 触摸滑动.
- touchend: 触摸结束.
二、 事件对象 event
我们先绑定一个开始触摸事件给 body 来查看一下回调函数中的 event 对象。注意,需要打开浏览器的移动设备调试。
html
<style>
  * {
    margin: 0;
    padding: 0;
  }
  body {
    width: 100vw;
    height: 100vh;
    background-color: #2c3e50;
  }
</style>
<body></body>
<script>
  let body = document.getElementsByTagName("body")[0];
  body.addEventListener("touchstart", function (e) {
    console.log(e);
  });
</script>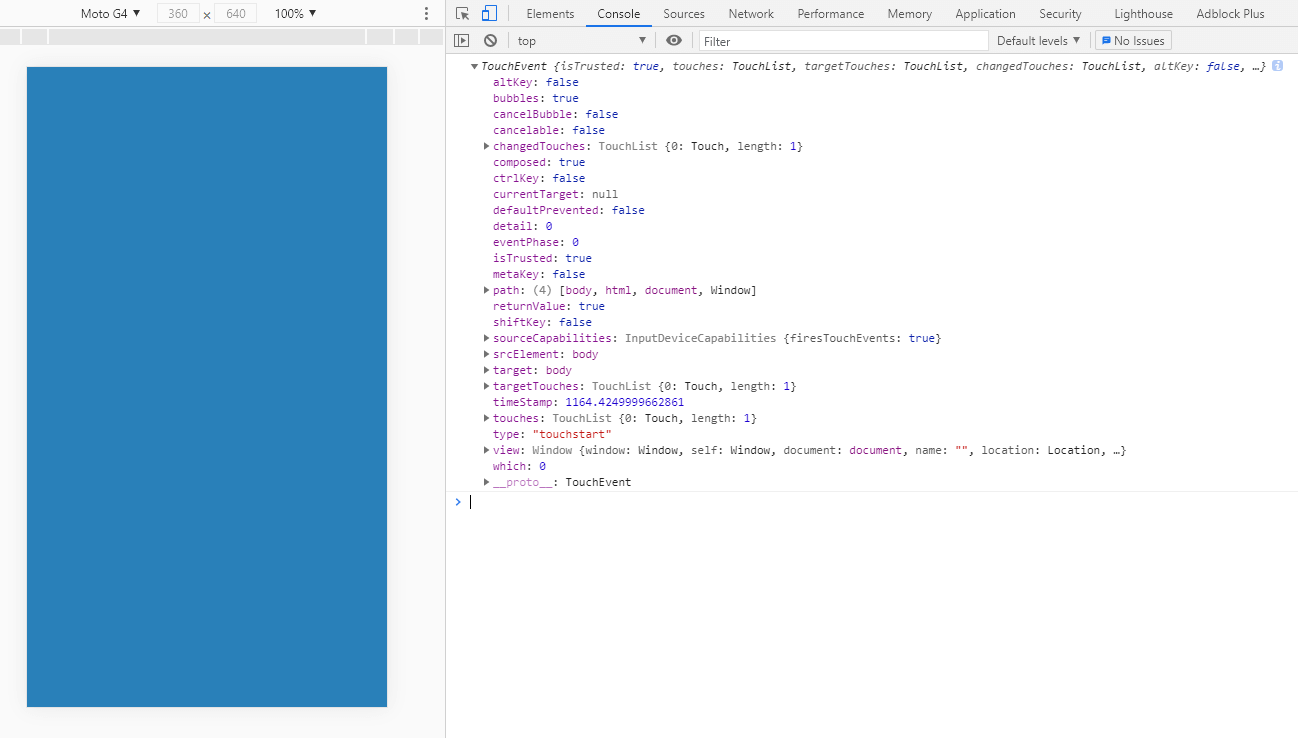
重要参数:
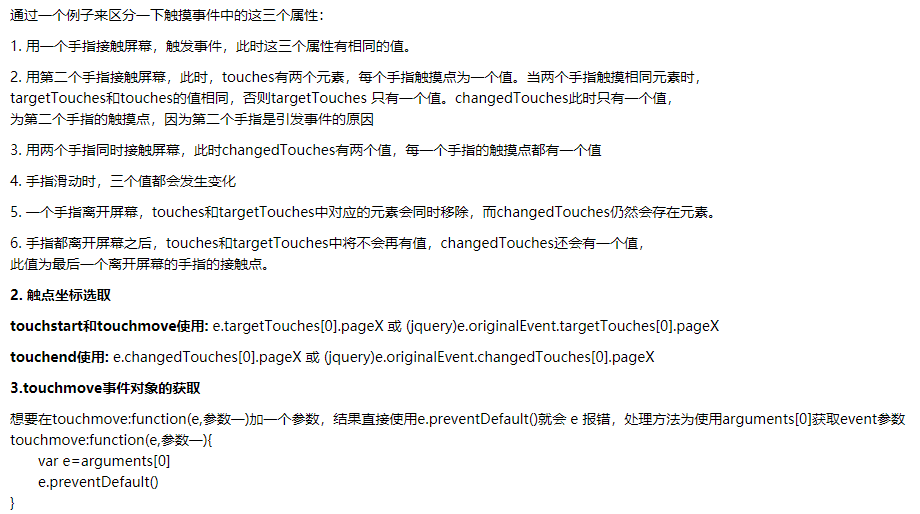
- touches: TouchList 列表,只读。会列出所有当前在
与触摸表面接触的 Touch 对象,不管触摸点是否已经改变或其目标元素是在处于 touchstart 阶段。 - targetTouches: TouchList 列表,只读。包含
仍与触摸面接触的所有触摸点的 Touch 对象。 - changedTouches: 这个 TouchList 对象列出了
和这个触摸事件对应的 Touch 对象。- 对于 touchstart 事件, 这个 TouchList 对象列出在此次事件中新增加的触点。
- 对于 touchmove 事件,列出和上一次事件相比较,发生了变化的触点。
- 对于 touchend 事件,changedTouches 是已经从触摸面的离开的触点的集合(也就是说,手指已经离开了屏幕/触摸面)。
三、 功能案例
1. 检测滑动方向
js
// html、style 结构同上
function directionMonitor() {
  let body = document.getElementsByTagName("body")[0];
  let startX, startY, endX, endY;
  body.addEventListener("touchstart", function (e) {
    startX = e.targetTouches[0].pageX;
    startY = e.targetTouches[0].pageY;
  });
  body.addEventListener("touchend", function (e) {
    endX = e.changedTouches[0].pageX;
    endY = e.changedTouches[0].pageY;

    let horizontalStatus = endX > startX ? "向右滑动" : "向左滑动";
    let verticalStatus = endY > startY ? "向下滑动" : "向上滑动";

    console.log(`当前的操作:${horizontalStatus},${verticalStatus}`);
  });
}
2. 实现元素拖拽
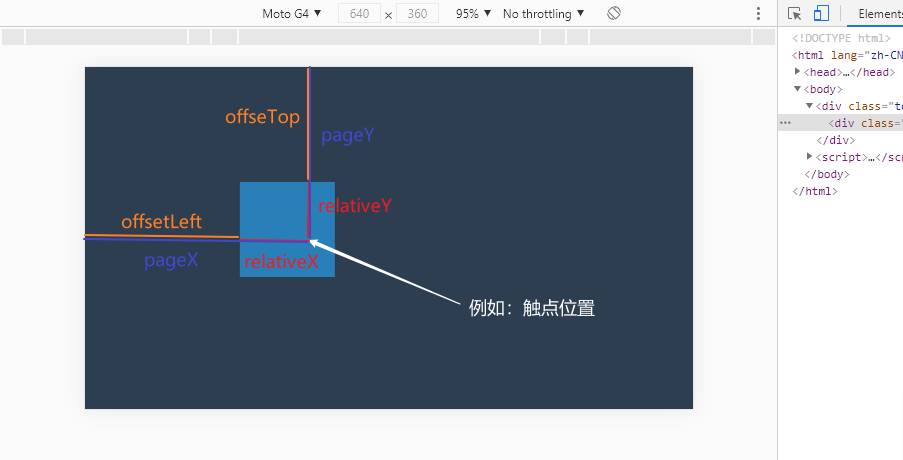
在实现这个功能的时候,一直找不到怎么获取相对位置,幸好小硅壳博主相关文章介绍,点击跳转
实现关键,获取触控点位于触控元素上的位置。
html
<style>
  * {
    margin: 0;
    padding: 0;
  }

  body,
  .touch {
    width: 100vw;
    height: 100vh;
    background-color: #2c3e50;
    overflow: hidden;
  }

  .touch .touch-item {
    position: absolute;
    width: 100px;
    height: 100px;
    background-color: #2980b9;
  }
</style>
<div class="touch">
  <div class="touch-item"></div>
</div>
<script>
  function dragMonitor(dragDom) {
    let touchItem = document.querySelector(dragDom);
    let relativeX = 0;
    let relativeY = 0;

    touchItem.addEventListener("touchstart", function (eStart) {
      relativeX = eStart.targetTouches[0].pageX - this.offsetLeft;
      relativeY = eStart.targetTouches[0].pageY - this.offsetTop;
    });

    touchItem.addEventListener("touchmove", function (eMove) {
      let moveX = eMove.targetTouches[0].pageX - relativeX;
      let moveY = eMove.targetTouches[0].pageY - relativeY;

      this.style.left = moveX + "px";
      this.style.top = moveY + "px";
    });
  }
  dragMonitor(".touch-item");
</script>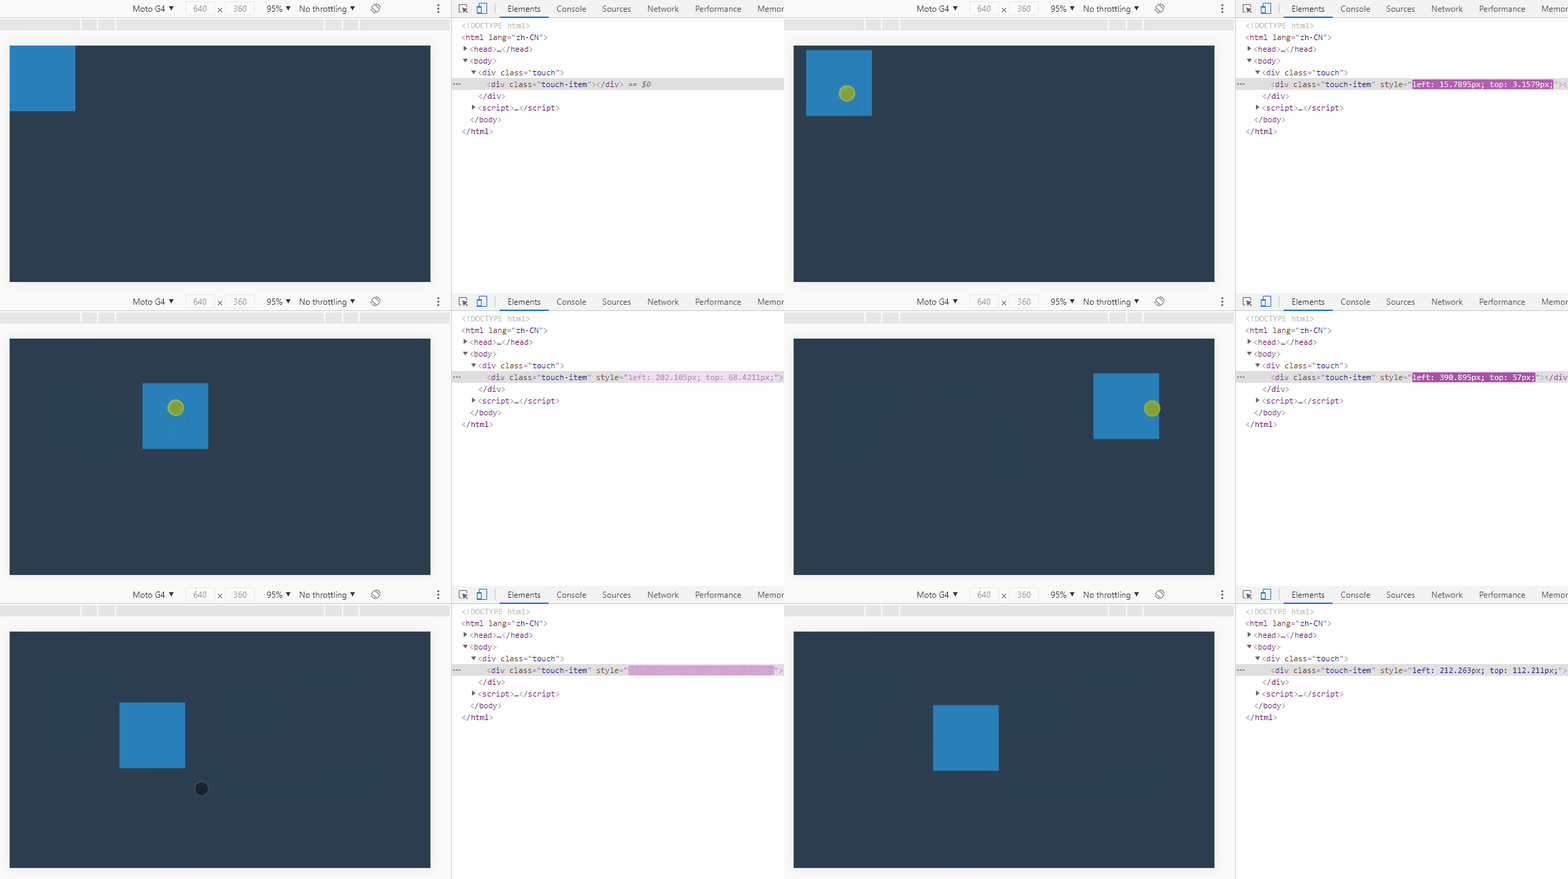
3. 实现元素旋转
实现关键:方位角,其是计算两点间的偏移角度。返回弧度单位值。
js
// 在javascript中提供了Math.atan2()函数
Math.atan2(终点y - 起点y, 终点x - 起点x);
js
function rotateMonitor(dragDom) {
  let touchItem = document.querySelector(dragDom);
  let startX, startY;

  touchItem.addEventListener("touchstart", function (eStart) {
    startX = eStart.targetTouches[0].pageX;
    startY = eStart.targetTouches[0].pageY;
  });

  touchItem.addEventListener("touchmove", function (eMove) {
    let moveX = eMove.targetTouches[0].pageX,
      moveY = eMove.targetTouches[0].pageY;

    this.style.transform = `rotate(${getAngle(startX, startY, moveX, moveY)}deg)`;
  });

  function getAngle(p1X, p1Y, p2X, p2Y) {
    let x = p2X - p1X,
      y = p2Y - p1Y;
    return (Math.atan2(y, x) / Math.PI) * 180;
  }
}
dragMonitor(".touch-item");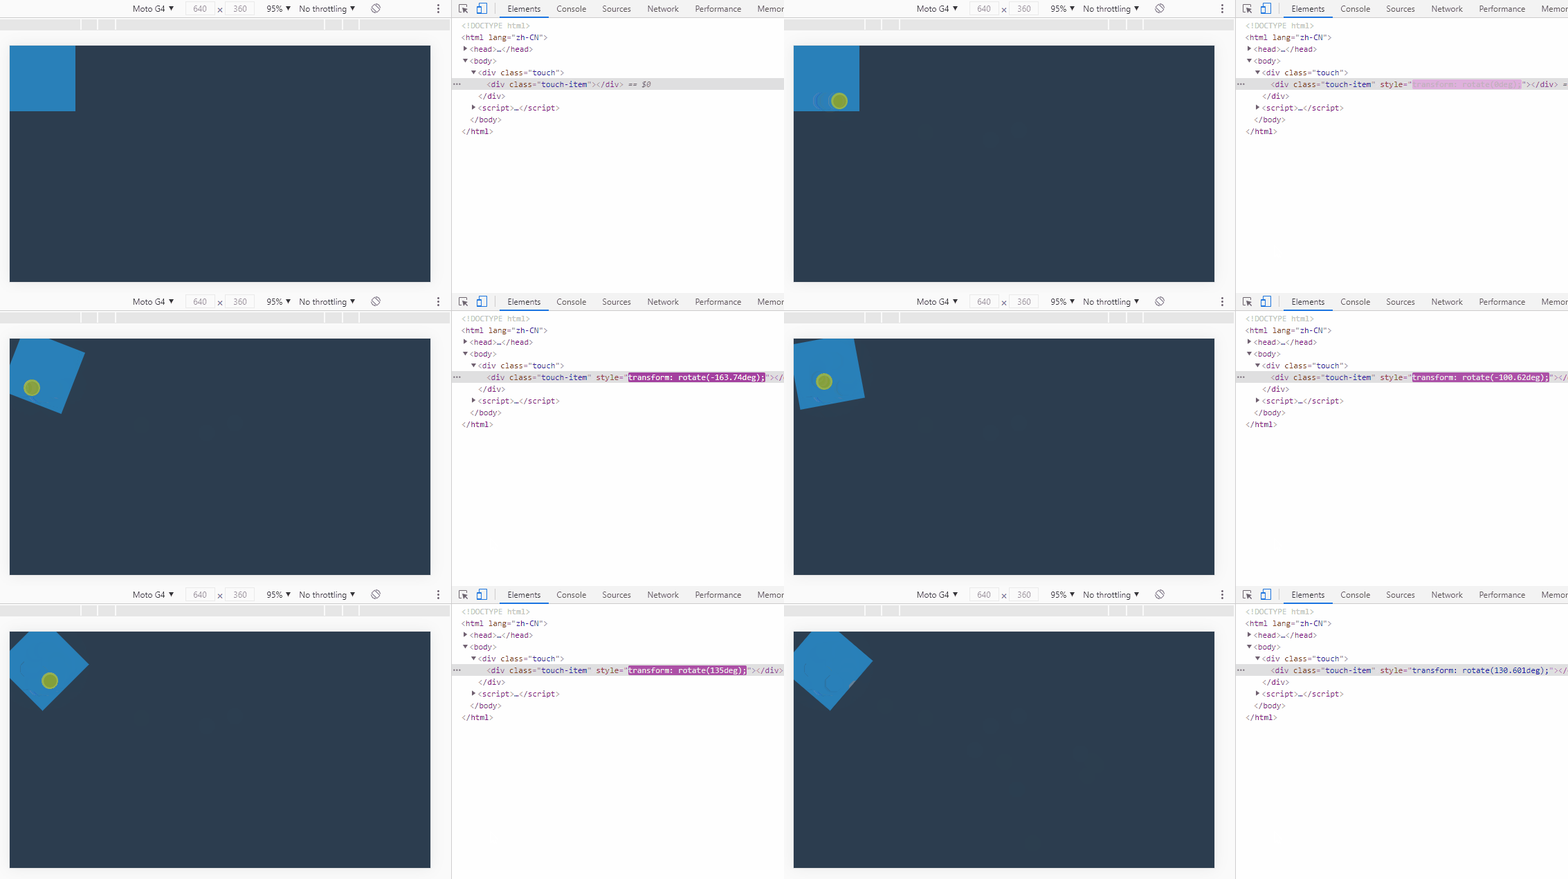
原文:http://blog.sina.com.cn/s/blog_468530a60102wzkw.html 出处:https://www.cnblogs.com/mengff/p/6005516.html
盒子拖拽效果:https://blog.csdn.net/weixin_50794208/article/details/113858299
总结
综上,便是今天所介绍的全部内容,在触摸事件中,需要区分 touches、targetTouches、changedTouches,三个 TouchList 列表。感兴趣的可以拷贝 demo 运行查看结果。
最后,如果您有更好的方法,欢迎在留言区中分享;或者实际操作中遇到什么问题均可留言或者私信我,感谢您的观看!
参考博客:
